04/20/2007
We are pleased to announce the latest release of Property Manager version 7.3. Many changes have been made to Property Manager and this document will highlight each of them.
In prior versions of Property Manager, the application settings were stored in the local machine’s registry. This required the person installing a Property Manager update to have administrative rights to the PC they are working on, which is not always the case. To avoid this problem going forward, these application settings have been moved into a ”PropertyManager.INI” file. This change allows the modification of application settings without requiring administrative rights for the update.
Users now have the ability to view the Bostonpost Notice window that pops up at login again, after it has been closed by clicking OK.
Navigate to Property Manager > Reminders > Display Bostonpost Notices, or click the down arrow next to the Reminders icon ![]() in the toolbar to change the icon to the Text Bubble
in the toolbar to change the icon to the Text Bubble ![]() and the Bostonpost Notice window will pop-up. From here you can again view notices that have not been dismissed, or check the box(es) to include Dismissed or Expired notices. Notices can also be printed from this window.
and the Bostonpost Notice window will pop-up. From here you can again view notices that have not been dismissed, or check the box(es) to include Dismissed or Expired notices. Notices can also be printed from this window.
User Options
Household Detail
General Tab
Members Tab
Waitlist Tab
Notes Tab
Income & Expense Tab
Transaction Tab
Add Selected Transaction and MAT Record & Delete Selected Transaction and MAT Record Tasks
TIC Forms (where applicable) Accommodate more Individual Assets
Accounting Tab
Summary Tab
Receivables and Subsidy Tabs
Receivables Tab
Subsidy Tab
Deposits Tab
Community Detail
Program Info Tab
Rent Tab
Unit Detail
General Tab
Compliance/Rent Transaction History Tab
Accounting Detail
General Information Tab
Payments Tab
General Ledger Tab
Occupancy and Compliance Detail
General Tab
Waitlist and Manage Vacancies Tabs
TRACS Tab
TRACS General Tab
TRACS Misc Adjustments Tab
TRACS HAP Requests Tab
Public Housing
Annual Recertification Process
Accounts Payable Detail
Work Order Detail
Business Detail
General Information
Maintenance Company Detail
System Administration
Maintain Documents Tab
Maintain Lookup Tables Tab
Define Access Tab
Accounting Setup Tab
Charge Type Setup
Export Information Setup
Reports
Conversion Detail
Households
Following are new tasks for which your System Administrator must set security before they will be available in the Tasks list. This is set in System Administration > Define Access Tab.
|
Found in Path on Define Access Tab |
Task Name |
|
Property Manager > Accounts Payable Detail > Invoice Detail > Invoice Detail |
Add Note Approve & Track Comps Approve Selected Invoice Delete Note Hold For Accounting Hold For Maintenance Load to Accounting Maintain Note Maintain Selected Invoice Print Selected Invoices Remove From Hold Remove Tenant Chargeback Set Tenant Chargeback Unapprove Invoice |
|
Property Manager > Conversion Detail > Units > Units |
Assign Unit Information |
|
Property Manager > Household Detail > Accounting > Accounting Tab Page > Deposits |
|
|
Property Manager > Household Detail > Accounting > Accounting Tab Page > Notes |
Writeoff Selected Note Remaining Balance |
|
Property Manager > Household Detail > Accounting > Accounting Tab Page > Receivables |
|
|
Property Manager > Household Detail > Accounting > Accounting Tab Page > Summary |
|
|
Property Manager > Maintenance Company Detail > AR Detail > AR Invoice Detail > AR Invoice Detail |
Add Note Approve Selected Delete Note Export Invoices Maintain Note Print Selected Invoices Unapprove UnBill (Delete Selected Invoices) |
|
Property Manager > Maintenance Company Detail > AR Detail > Create AR Invoice > Create AR Invoices |
Create IOI AR Invoice Purge Selected Line Items |
|
Property Manager > Occupancy and Compliance Detail > General Information > General |
|
|
Property Manager > Occupancy and Compliance Detail > TRACS > TRACS Tab Page > HAP Requests |
|
|
Property Manager > System Administration > Accounting Setup > Accounting Setup Tab Page > Community Export Setup |
You may have noticed that Property Manager Help/Documentation has been growing recently with more documentation being added all the time. Property Manager Help is accessed in a few different ways:
Property Manager Help will open a user's web browser to the Welcome Window:
Property Manager Context Sensitive Help will open help to the topic that relates to the window being viewed. Context Sensitive Help is also accessed by clicking on the Question Mark Icon ![]() in the Toolbar.
in the Toolbar.
Access Help from the Tasks List
Task Help will open help to the topic for the selected task. Clicking on the Question Mark Icon ![]() in the Tasks List will display the help/documentation for that task.
in the Tasks List will display the help/documentation for that task.
Users always had the ability to open a Tasks List from any window in Property Manager without a mouse, by using the [Ctrl]-T keys on the keyboard, but then had to use the mouse to select a task. With version 7.3, users can now use the arrow keys to select the task and the Enter key to launch the highlighted/selected task.
If regulations and/or business rules allow a balance schedule (rent & subsidy) to be extended, the balance schedules will be extended one month at the end of the billing cycle for the next month. For example, when rent & subsidy bills for 04/01/07, expired schedules will be extended one month to 05/31/2007. This means that reports such as Rent Roll Report will be able to predict more accurately what will bill in the next billing cycle (5/1/2007). A Rent Roll run for 05/01/2007 during the month of April will include rent and subsidy for households where the balance schedules had expired and have been extended. In prior versions of Property Manager, expired balance schedules were extended, but not until right before they were billed.
From File > User Options, users now have the ability to set the sort order for the Household drop-down list in the Household Context Bar (the context visible when viewing the Household Detail windows).

The Occupancy and Compliance Detail > General Tab window has been add to the drop-down list for Startup Options. This window can now be selected as the window that opens when first logging into Property Manager. When logging into Property Manager, the context will be set to <All Authorized Communities> and the view will be set to <All>.
The View Household Activity Log task allows users to review actions that were performed for the household that may not be visible from the Household Detail windows once the action has been performed. i.e. – delete a transaction from the Transactions Tab.
A new column has been added to this log to show the computer name on which that the action was performed. Displaying the computer name along with the User ID will help in determining how and why an action was performed.
Property Manager > Household Detail > General Information Tab, the Unit Information section of the window now displays the Unit Class. In many cases the Unit Class is different from the Number of Bedrooms for the unit. So having that additional information on the Household’s General Information tab will be more helpful to the user.
All the steps on the Annual Recertification (AR) Task will now show the date of the cert that is associated with that step.
If a prior AR had not been completed and the new AR needs to be started, it could be confusing to the user which AR, old or new, the user is working on. The best example of this is that the signed dates on the prior AR had never been filled in. In the following example, the 04/01/2007 AR needs the signed dates filled in, and therefore, Steps 4 and 5 of the Task relate to the 04/01/2007 AR which should be completed before starting the process for the 04/01/2008 AR.

In Step 4 of the Annual Recertification wizard (Process Income, Assets & Exp. Create Certification), the Create Certification tab has been made clearer in regards to what will be done with the household’s voucher when the annual recertification is completed.
If there is an existing outside voucher renewed on a date different from the Annual Recertification effective date and "No Changes" is selected, the existing outside voucher information will be displayed. If an existing outside voucher renews on the same date as the Annual Recertification, the "No Changes" choice for the outside voucher is replaced with a "Renew Voucher" choice, and the new effective dates are assigned accordingly.
When printing a Certification Form as a result of a retroactive change, the system will now print any subsequent certifications (certifications effective after the retroactive change), that were rebuilt as a result of creating that certification. For example, an Annual Recertification or Interim Recertification is printed and signed by the tenant and owner, and then a month or so later, a Gross Rent Change is entered that is effective for a date earlier than the printed and signed AR or IR. Since the AR or IR is changed by the Gross Rent Change, the system will print out the Certification Form for AR or IR at the same time the form is printed for the Gross Rent Change.
The Compliance Override option has been moved from the Swap Counted Group step to the Create Transaction step.
A new step has been added to the Swap Counted Group task for modifying members. If a user swaps an occupied household, the new group may have required fields on the household Members Tab that were not required by the original group.
The Create Transaction step has been added to the task. This is the same step that is in the Annual Recertification and Interim Certification wizards. Depending on the funding program(s) that make up the household's new counted group there may be additional information sections. Users may be able to add, modify, or remove voucher. In addition, they may also need to set the rent for the household and/or add funding program-specific details.
Related to this, the Add/Modify Voucher task has been changed to prevent changes effective on the same date as a group change. The system presents a message explaining to the user that vouchers effective on the same date as a group change must be modified through the group change task.
Users receive a message and are prevented from continuing the Swap Counted Group task if the new funding program group does not allow outside vouchers (i.e. - HUD Sec 8) and the existing outside voucher is not expired prior to the swap date.
This enhancement is needed for public housing to track the date that a person started in public housing for a unit under the same PHA project number. It is referred to as the Date of Admission to Program (2h) on the 50058.
This date is entered during the Certify Move-In step of the Move-In wizard.

Validation has been added to Property Manager to prevent an occupancy change from being scheduled when a future swap exists, and the unit will be counted in a different program group. If there is a future swap, you will need to call Bostonpost Support to undo the swap before scheduling the occupancy change.
Notes for a Unit Transfer or Move-In will now display the number of bedrooms in the unit in addition to the community and funding program group for the waitlist on which the household is waiting. For example, the note will read ”Waiting for 2-bedroom unit at Community A for the Tax Credit Funding Program Group.”
Notes for a scheduled Move-In will now display the community and unit in addition to the scheduled Move-In date. For example, the note will read ”Scheduled Move In Mar 1 2007 at Community A for Unit 1-100.”
Notes will be clearer regarding the existence of an unsigned certification, but since it has not been signed yet, the old amounts will continue to bill. Billing notes that may display:
If no active schedules exists: "No Scheduled Transactions", to indicate the system is no longer billing.
If a matured schedule is extended: "Billing schedule for rent expired 03/31/2007 - Extended for billing 04/01/2007", to indicate the household is overdue for an AR, but the schedule is extending for billing, following funding program rules.
If a matured schedule is extended with an unsigned certification: "Billing schedule for rent -Unconfirmed change exists for 04/01/2007- Current amount good thru 03/31/2007".
When using the Transfer Household task from Property Manager > Household Detail > General Information Tab, the process to schedule a Unit Transfer now checks to make sure that the new unit is in the same unit bundle (under the same HUD Contract) as the old unit.
Once a Unit Transfer has been scheduled for a household, the Move-Out Household task will not appear. If the Unit Transfer is to be changed to a Move-Out, the transfer must be un-scheduled before the Move-Out task will be available.
When undoing a scheduled transfer, if there is a future Move-In scheduled for the unit where the household currently lives, a more informational message will be shown: ”Joan Smith Household ID 1111 is already scheduled to move in to Unit A. Un-schedule that move in first before undoing this moveout."
Users can set the household member Eligibility Code to "XX – Not Counted as a family member, such as a Live-in attendant or Foster Child/Adult". This allows Property Manager to enforce HUD and PHA rules.
New fields are available on the Members Tab in order to support changes in Handicapped and Student Status with an effective date for changes. They include yes or no answers for Mobility Impaired, Hearing Impaired and Visually Impaired. Please note these three items are only required for HUD funding programs. The Modify Relationship/Student/Handicap Status task has been added in order to change these fields. The task was added so that the changes will have an effective date associated with them. In prior versions, these statuses were maintainable directly from the Members tab.
The Add New Waitlist Entry(s) Task now includes a tab to review Member Details to make sure all required fields have been filled out. This ensures that required fields used to determine eligibility for programs are complete.
The task now also gives the user the ability to pick non-income based funding program layers. This is necessary for any non-income based funding programs in a funding program group.
A new column has been added to the Notes tab for ”Rent Again”. When a Rent Again Note is added during the Move-Out Task the note is displayed on the household’s Notes tab with Yes or No in this column. During the Move-Out task if a user selects No for the Rent Again question, he/she will be required to enter a reason why.
If a household has a ”Rent Again” note, it will also show on the Household Detail > General Tab in the Activity/Notes section.
Experience has been that many of the third party verification forms are returned verifying the interest rate out to the forth decimal place, i.e. 3.4599%. Therefore, the Growth Rate entered for assets has been expanded to 4 decimal places.
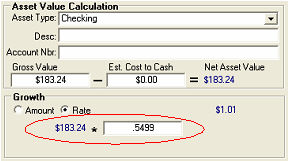
Expanding the number of decimals on the growth rate allows the user to enter the item exactly how it has been verified, and should result in less user entry error.
When trying to delete a transaction, the user will now be required to enter a reason for the delete. (Maximum of 200 characters)
The text entered in this field will be displayed in the Household Activity Log. This log is accessed from the Tasks list on the Property Manager > Household Detail > General tab. The text entered will be displayed in the ”Comment” column all the way to the right of the window for the row showing the deletion of the certification.
With the addition of the Reconcile Selected HAP Request task (see New HAP Reconciliation Process below for an explanation of this new task), the use of these tasks should be limited to a few situations. For example, the Add Selected Transaction and MAT Record and Delete Selected Transaction and MAT Record tasks would still be needed if the user is not ready to reconcile the HAP request, but needs to make revisions at the request of HUD/Contract Administrator. The tasks are available until the HAP Request that includes the certification has been reconciled.
In addition, when a Subsidy – HAP Request payment batch has been created for the community and the HAP Request has been selected (even if the payment batch has not been processed/posted yet), users will not be able to use these tasks. This restriction has been added because in the past, when a user modified a HAP Request that had been paid, any balance item associated with an event that gets moved to that HAP that has been paid would never be available for a HAP payment.
An error message will be generated if a user attempts to enter a transaction with an effective date that is less than or equal to a household Move-In date, and less than the receivables start date/first subsidy billing date for the community. Users must contact Bostonpost Support for assistance with this type of transaction.

Once a community is "live" the conversion tasks are no longer available. Generally, the appropriate wizard (Annual Recertification, Interim Recertification) on the General Tab of the household detail should be used to enter a transaction. If assistance is required the user should contact Bostonpost Support.
If a community is in conversion status a user must use the Add Transaction to Household task to enter a transaction that is effective prior to the receivables start date/first subsidy billing date ("live date") for the community at Property Manager > Conversion Detail > Household Tab.
When a user inserts a new transaction from Property Manager > Household Detail > Transactions, the date will now default to the 1st of the next month. This date can be changed. By having the date to default to the 1st of next month instead of to today’s date, there will be less chance of the user creating a mid-month transaction in error.
For TIC forms that require a breakdown of assets, the form can now accommodate the listing of more assets (up from 8 to 16 rows). This impacts the following TIC Forms: IA, IL, LA, MD, ME, MO, NCSHA, NJ, NY HFA, OH, PA, Spectrum, TSAHC, TX, WA, WI. All other TIC Forms show only total assets, no breakdowns.
With Version 7.3, when a HUD certification is un-signed, the prior certification’s scheduled items will be extended until the current certification is signed again or as long as regulations dictate (i.e. – 15 months since last AR).
Event History has a new level of detail, Monthly Summary, and the ability to group event history by Due Date in addition to Event Date and Timestamp. By summarizing by month, either by event date or by due date, users are able to ignore 10 billing corrections, for example, if the net affect of them is correct. When viewing by the Monthly Summary by Event Date, users can see if the billings are correct over a period of time and if the tenant or agency is making timely payments. When viewing the Monthly Summary by Due Date, users can see which open items are still open, what activity has occurred to get to the current balance, and what needs to be done to collect the remaining balance.
From Monthly Summary users can highlight a row change the view to the other levels of detail: Summary, Detail and Full Detail, and it will be scroll to detail history for that month. The Monthly Summary view is not available when the Group By is set to Timestamp. The only Event History tasks available from the Monthly Summary view are the Print and Export Event History tasks. All the other Event History tasks are available from the other views.
From File > User Options users have the ability to default the View and Group By for Event History. By taking advantage of this User Option setting, the Event History view will default to the user's favorite view every time he/she navigates to a Household’s Accounting tab.
When using the Print Event History task, the header of the resulting report will now indicate whether the event history is being displayed by Event Date, by Due Date or by Timestamp.
From any of the Accounting Tabs (Summary, Receivables, Subsidy, Deposits, and Promissory Notes) users have the ability to print event history. The heading of the report has been modified to show the current unit of the household, even if the report is run for a date range when the household occupied a different unit.
If the household is no longer living in a unit, it will take the last known unit for the household before the end of the date range.
A new task has been added that gives users the ability to print a Late Notice for the selected household. A late notice will only print for the current month, if the household meets the criteria specified for printing late notices for the community in which they reside.
This task will be available both when the household is active or inactive in a unit and the community is no longer in conversion status. After entering the task, there is a warning to the user when this task should be used and when it should not:

At the bottom of the window, there are two tasks to select from
:![]()
The "Modify an existing Beginning Balance” option will list existing beginning balances, with a column indicating if there has been subsequent activity for that balance type. Opening balances will be a sum of the amount entered through initial data entry plus any adjustments that have been made to the opening balance post-conversion. If there is subsequent activity, and a user attempts to modify the opening balance, the following message will pop-up:

The task ”Add a new Beginning Balance” will present the user with a drop-down list to select a new opening balance to add. This list will be restricted to balance types that do not already have a beginning balance.
When maintaining an existing Beginning Balance, the effective date (event date) will be the same as the original opening balance event. When adding a new beginning balance, the effective date will default to the date of the first recorded occupancy for that household for deposits, and for all other charge types will default to one day before the community "Live" date. The user will have the ability to modify this date, and validation will ensure that the date is on or after the first recorded occupancy, and before the community "Live" date. When modifying an existing opening balance, the effective date will be set to the latest date of the existing opening balance items, and the user will not have the ability to modify this date.
When adding a promissory note, the amount due must equal the amount remaining on the note, so when a payment is applied to the amount due, there will be the correct remaining amount to apply it to. In other words, a user cannot create a promissory note through the task where the remaining amount on the note does not equal the amount due. Therefore, modifying either the due or remaining amount for the note will automatically change the other half to match.
Scheduled items that are created from certified transactions (I.e. – rent, utility reimbursement, subsidy, overage) can no longer be reversed from the Receivables and Subsidy tabs using the Reverse Selected Event task. Events created from these Scheduled Items are tightly integrated to the certified transactions that govern them. If something is wrong with an open item or event created from a certified transaction, the certified transaction must be incorrect, and correcting the certified transaction will correct the open items and events. If, for example, rent should be written off or concessioned off, then the Write off Selected Receivable task or Add New Receivable (for a concession) task should be used - the Reverse Selected Event task will not appear.
When using the Apply Credit task, the effective date of the event can be in the future, but no farther in the future than the latest future effective date of the open items being applied. If the effective date of the apply credit event is changed to a future date and that date is later than the latest date of the open item to be applied, a new error message ”Effective date of apply credit event cannot be greater than latest future open item due date” will be displayed. For example, if on a Move-Out effective today a rent credit is created, it will be dated with tomorrow’s date (events from Move-Outs are always dated one day after the date of the Move-Out) the user will have the ability to change the effective date of the apply credit event to that future date (tomorrow).
A new task Apply Receivable Credits to Deposits has been created. This task functions much like the Apply Credits task, but is specific to applying most credits on the Receivables tab to outstanding Deposit Due items on the Deposits Tab. Users cannot apply credits from Prepaid and Utility Reimbursement Open Items against Deposits.
The resulting GL Entry will re-class the credit from the Accounts Receivable GL account to the Security Deposit Liability GL account. There will also be a GL Entry to re-class the cash from the Operating Cash GL account to the Security Deposit Cash GL account.
By separating the ability to apply receivable credits to deposits out of the Apply Credits task into its own task, this action is made more deliberate by the users and the task can be made available to only specific user groups via security and still allow users to utilize the Apply Credits task.
There is a new task Waive Selected Late Charge. Highlight the Late Charge open item and select Waive Selected Late Charge from the Tasks list. The task defaults to waiving the entire amount, but allows the user to change the amount if necessary. The resulting event will be recorded as a Billing Correction, and will have an effective date that matches the effective date of the Assess Charge.
With version 7.3, other processes and tasks related to certified transactions and HAP Requests have eliminated any reason a user might have to use this task. If you are unable to correct subsidy open items using these other tasks, please contact Bostonpost Support for assistance.
The list of open items shown in the Convert Subsidy Due to Promissory Note task will only show open items where there is an offsetting amount between rent/utility reimbursement and subsidy for the same due dates. In the past, this task showed all rent/utility reimbursements and subsidy open items, not just the ones that should be converted into the Promissory Note. The task now only shows the open items that will be converted, reducing the chance of error.
These promissory notes are created typically when a tenant misreports income that results in an overpayment of subsidy that must be returned to HUD. To process this in the system currently the user would create a retroactive tenant certification to record the unreported income. This transaction will create the correct billing adjustments. The HAP Request will show an adjustment returning the subsidy overpayment to HUD. The HUD handbook 4350.3 rev1 states that the owner does not have to re-pay HUD the subsidy money until the tenant has repaid the owner.
When a back-dated certification is created with adjustments, the Convert Subsidy to Promissory Note task will now create an OARQ miscellaneous adjustment for the full amount of the subsidy adjustments that are being converted to a promissory note, instead of creating subsidy adjustments to remove the existing subsidy adjustments. On the HAP Request, the subsidy adjustments will be shown in the adjustments section, and the offsetting OARQ will be shown with the miscellaneous accounting adjustments. As before, when the tenant later makes a payment on a billed Note Payable Net Subsidy item, an OARQ miscellaneous adjustment will be created for inclusion in the next HAP Request.
The Reverse Selected Event task is no longer available for subsidy payments that are included on a HAP Request. This was done to reinforce the reconciliation of HAP Requests and make sure payments are applied correctly. When the subsidy open items are cleared correctly, future HAP Requests will be built with the correct adjustments. If the subsidy payment is not related to a HUD program using the HAP process, you will still be able to utilize the Reverse Selected Event task to reverse a ”non-HAP” subsidy payment.
Related to this, the Adjust Posted Payment task is also no longer available under Accounting Detail > Payments Tab > Processed Payments for Subsidy – HAP Request payments.
When selecting the Apply Credits task the first tab of the task will now show a list of funding programs and/or voucher sources for the user to choose from for Apply Credits. If a user selects a funding program, all subsidy open items that are in a community funding program group that is funded by that funding program will be available in the apply credits step. If a user selects a voucher source, all subsidy open items that have that voucher source will be available in the apply credits step. When selecting to apply credits by subsidy source users now have the ability to apply credits across funding program groups as long as the voucher source is the same.
There is a new Maintain Deposit On Hand (No GL) task available only when the household is in a community with a billing mode is "Bill Subsidy Only". This task will allow you to maintain the amount of a deposit on hand, without the need for schedules, billing and payments. Maintaining the amount will add, update or delete (if the amount is set to zero) the security deposit on hand.
A new Security Deposit Method has been added. The new choice is the ”Lesser of Basic Rent or a Fixed Amount". Once selected, an ”r;Amount” field will be available to specify the fixed amount. This method is a way of capping security deposit amounts at a specific amount.
Complete List of Security Deposit Methods:
<None>
Basic Rent
Tenant Portion
Tenant Gross Rent (including UA)
First & Last Months Market Rent
Fixed Amount
Greater of One Months Total Tenant Portion or Fixed Amount
Fixed Rate by Bedroom Size
One-Half Tenant Gross Rent
One and One-Half Tenant Gross Rent
One-Half Tenant Portion
One and One-Half Tenant Portion of Rent
Greater of Basic Rent or Total Tenant Contribution
Lesser of Basic Rent or Fixed Amount
Users now have the ability to designate the deposit transfer method for each community funding program group. The choices are "Transfer Existing Deposit" or "Charge New Deposit". When a tenant is transferred from one unit to another, this choice will determine whether their existing deposit is carried over to the new unit, or, if the deposit for the new unit is based on the newly calculated amount.
There is a new checkbox for tax credit programs, to identify which program is the federal program. This will be used in the future to simplify tax credit reporting.
When a Tax Credit Funding Program is selected the Certification Form drop-down list now has a <None> choice. If the <None > is selected, then a TIC form will not print or show on the Property Manager > Household Detail > Transaction Tab, for that Tax Credit program.
For example, if a community has one active funding program group with 2 funding programs in it. One Tax Credit (Federal Program) and the other a Tax Credit State Set Aside. If the state set aside is more restrictive than the Federal Program the Certification Form for the Tax Credit (Federal Program) can be set to <None>. This gives you a way to signify that one of the Tax Credit funding programs within a group is secondary to another Tax Credit program in the group and print forms just for the primary Tax Credit program.
Property Manager has been enhanced to better suppress expired Funding Program Groups from lists throughout the application when there are no households living in it. This will prevent a user from using an expired Funding Program Group and accidentally adding a household to it.
Under Rent Plan Information there are two options for how rent is charged on a Manager’s Unit in a USDA community:
Charge No Rent will set the Gross Potential for the unit to Zero.
Charge Basic Rent will charge Basic Rent. A concession will need to be set up to offset the rent charge, if necessary.
A display field has been added under the ”Apt Nbr” field labeled "Building Nbr/Apt Nbr". The field shows the Building Nbr that corresponds to the building selected, and will display as Bldg Nbr-Apt Nbr. For example, if the Building Nbr is 29 and the Apt Nbr is 501, it will display in this field as 29-501. By displaying the information entered in the "Building Nbr" field on the Unit General Tab, all information that is populated on the 50058 cert form pertaining to the unit will be visible in one place making things easier for the user to see/verify.
Offline status reasons are now defined at the system level and are not maintainable by the user. Offline status is considered either Temporary or Permanent. If a unit is taken off-line for a permanent reason, it cannot be brought back online.
When a unit is vacant and does not have a scheduled Move-in the Take Unit Offline task is available. In the first step of the task enter the Effective Date for the change in status. In the second step select the Offline Status Reason:
Temporary off-line status assumes that the unit:
Physically still exists
Physically and financially is still part of the existing community with regard to reporting
May at any time be placed back on-line
Permanent off-line status assumes that the unit:
Either does not physically exist – e.g. has been demolished during a rehab project
or
Is no longer financially part of this community – e.g. the unit has been converted to a condo and the unit has been sold
If taking a unit offline for one of the permanent reasons, the following message will appear:

If the user confirms to the positive, the unit will be taken permanently off-line, and the Demolition Disposition Date will be populated with the effective date entered in the first step of this task. The task to bring a unit on-line WILL NOT be available for units that were taken off-line permanently.
Units that are permanently off-line will not be counted in a Funding Program Group, while temporarily off-line units can be. Units that are permanently off-line will not be in the Unit drop-down list of the Unit Context bar for the selected community.
Other impacts of placing a unit temporarily or permanently off-line include:
When placing a unit Online, the user can now select the funding program group the unit should be counted in. The task will show all funding program groups for which the unit is eligible, and as a default check off the funding program group the unit is currently counted in. This will allow the user to count the unit in one of the listed funding program groups as of the effective date of the online status.
The Take Unit Offline and Place Unit Online tasks now have a first tab that prompts for an effective date. After clicking Next, the effective date will be verified, to ensure that the unit was vacant on the effective date, and that there is no activity for that unit after the effective date.
If the unit is not vacant on the date entered, the following message will be displayed "This unit (xxx) was not vacant on the date provided ('mm/dd/yyyy')'.
If the unit is vacant for the date entered, but there is activity for the unit after this date, the following message will be displayed "This unit (xxx) has activity after the date specified ('mm/dd/yyyy')'.
In the upper left corner of the window Property Manager now displays the current RA Status: Receiving RA, Waiting for RA, Ineligible for RA or No RA.
Also, each row in the ”View Transaction History – All Transactions” section has a ”more” link at the end of each row to display more details about each row, including its RA Status.
For Bostonpost Financials customers, under Property Manager -> Accounting Detail there is the ”Launch Bostonpost Financials…” menu item as well as a toolbar icon ![]() that allows the launching of Bostonpost Financials directly from Property Manager. With version 7.3, users now have the ability to set the Bostonpost Financials Company ID, User ID and Password. With these set for the Property Manager User ID under File > User Options, once logged into Property Manager a user can easily open Bostonpost Financials without having to log in again.
that allows the launching of Bostonpost Financials directly from Property Manager. With version 7.3, users now have the ability to set the Bostonpost Financials Company ID, User ID and Password. With these set for the Property Manager User ID under File > User Options, once logged into Property Manager a user can easily open Bostonpost Financials without having to log in again.
The Owner’s Phone Number and EIN (Employer Identification Number) are now pulled into the 236 Excess Income Report. This information is added/maintained under Property Manager > Business Detail > General Information. When adding an Owner to the Owner Table under Property Manager > System Administration > Maintain Lookup Tables, the Owner is automatically added as a Business under Business Detail. So after adding the owner, the user will need to navigate to Business Detail to add the Phone Number and EIN.
When receiving payments, community drop-down lists have been restricted to only show active communities, and the payment selection lists (i.e. include unbatched payments list and various receivable selection lists) have been restricted to show receivables only for active communities. This enhancement is especially helpful for customers who are bringing on new communities that are still in conversion. It will prevent users from creating payment batches for a community that has not completed the conversion process yet.
Once a user has selected a Default Community on the Payment Batch Detail tab, payments added to the batch are now restricted by the payment batch's default community and the user's authorized community list. This is true for unapplied payments, prepaids, adding receivables, and attaching unbatched payments to a batch.
When going back into a pending payment batch that had already been started, users are no longer able to change the Default Community on the Payment Batch Detail tab. If the Default Community that had been selected when the payment batch was first started is incorrect, the payment batch will need to be deleted and new batch started.
Further validation has been put in place to prevent users from creating Prepaids for a household that exceeds the charge that is being prepaid. For example, if a household’s rent charge for the next month is $100, the system will not allow a user to create one or more Prepaids for that charge that exceeds the $100. When creating Prepaid, either in the Payment Batch Process or in the Pending Payment Process, the system will check all other pending and processed payments to make sure the Prepaid does not exceed the charge it is to be applied against.
With the new HAP Reconciliation process, it is recommended that a HAP Request be reconciled before receiving a payment against it. If a payment is received against a HAP Request that has not been reconciled, the following warning will appear ”The HAP request should be reconciled first to ensure payment is posted correctly.” This warning will not prevent a user from continuing with receiving the payment without reconciling the HAP Request, however, it is strongly recommended.
After a HAP Request has been reconciled using the new task at Property Manager > Occupancy and Compliance Detail > TRACS > HAP Requests, there still might be situations where HUD does not pay the full amount. In this case HUD is not holding payment on any specific household (in fact the total amount of shortfall may not equal full open items) so the household level subsidy should be cleared and this new item will be tracked at the community level.
Therefore, at the Payment Batch Detail step of a Subsidy – HAP Request payment batch, the user can enter an amount that is withheld to cover this shortfall from HUD.

Enter the amount to be withheld as a negative number. When the payment batch is completed, an open subsidy item ”Shortfall” will be recorded for the contract and will appear on A/R reports and the Accounting view/Subsidy Activity tab.
When the withheld amount is eventually paid by HUD, enter a positive amount in the ”Shortfall Release (Withheld)” amount field for that payment batch, and the open item created above will be relieved.
Open Items and Events created from Subsidy Shortfalls are displayed on the Property Manager > Accounting Detail > Subsidy Tab, as well as on accounting reports.
To facilitate these amounts withheld and then released, a new charge type, ”Subsidy Shortfall” has been created (Property Manager > System Administration > Accounting Setup > Charge Type Setup). The cash and receivable GL accounts are defaulted from the Subsidy charge type.
It is possible to receive payments from HUD outside of the HAP Request Process. For example, a Subsidy Shortfall that is withheld by HUD may be paid back separate from a HAP Request. Also, Special Claims and Misc Adjustments may also be paid by HUD separate from a HAP Request. Therefore, when you receive money from HUD outside of a HAP Request, you can use the Subsidy – Non-HAP Payment Batch Type to receive this money. All open items that have been requested on a HAP Request cannot be received using this batch type and the Subsidy – HAP Request Payment Batch Type must be used.
With the new Reconcile HAP Request process and the new functionality for withholding/releasing subsidy shortfalls, there is no reason why the user should be selecting or de-selecting open subsidy items for the payment batch. The only exception is when a user needs to select the Subsidy Shortfall that was withheld from a prior HAP to be received through the current HAP.
The Adjust Posted Payment Task will not appear on the task menu when the selected item is a closed payment batch and batch type is Subsidy – HAP Request. This will prevent users from incorrectly reversing a subsidy payment that was paid as part of an approved HAP Request.
Related to this, the Reverse Selected Event task is also not available under Household Detail > Accounting Tab > Subsidy Tab.
Changes have been made to restrict data from being sent to the ”Processed with Errors” GL Batch Option view. This enhancement mostly impacts users of QuickBooks and Bostonpost Financials. For other Export Types that create an export file to load to the General Ledger, when the export file is created, the batch is considered exported successfully in Property Manager.
The ”Processed with Errors” GL Batch Option view has been changed to display errors with more detail about what went wrong, as well as what happened to the GL Batch before it was sent to this view.
Clicking on the Display Export Log link opens a pop-up window with information about activity for the selected batch, including any errors and overall status for the batch, as well as the user id and timestamp for each action. The Export Log will only contain information for actions taken on batches after upgrade to Version 7.3. GL Batches processed before upgrade will not have information in the log.
A new Set Selected Batches as Processed without Errors task has been added to remove items from the "Processed with Errors" Batch Option view and place them into the "Processed GL Batches" Batch Option view. This is used for items that might end up in the Processed with Errors view either by a user resetting by mistake or some other reason. This new task gives the user the ability to clear out processed with errors without actually processing the records.
The Create Filtered Adjustment Batch Task has been modified to make it more consistent with the rest of General Ledger processing.

The user now has only two options when processing a filtered adjustment batch. This ensures that filtered batches processing is handled in the same manner as other batches. This is especially important when changing or not changing the GL Report Date when processing GL Batches.
The Pending Activity section will include households who have an Annual Recertification that past due. After highlighting a past due Annual Recertification users can select the Annual Recertification task and launch right into that household’s Annual Recertification wizard.
Unsigned Annual Recertification, Interim Recertification, Annual Recertification corrections, and Interim Recertification corrections will now appear in the Pending Activity section as ”Unsigned Certifications”. When one of these items is selected, the Enter Signed Dates task will be available in the Tasks list. If users find a large number of certifications are "unsigned" in Property Manager they should contact Bostonpost Support for assistance.
Users now have the ability to sort the activity listed in the Pending Activity section by all columns in the view. To sort by a column click on the column heading to sort the activity in ascending order. Click the heading again to sort in descending order. Sorting by date allows the user to review the pending activity by the date of certification.
There is a new link for each applicant called Household Income. Double-clicking on this link opens a pop-up a window with the household's income currently in effect, which is either the household's verified income, or if there is no verified income, the preliminary income. The summary at the top of the window displays the effective date, gross annual income, adjusted annual income, and, if the income is preliminary, an asterisk. Below the summary the details of income, assets, expenses, deductions, and allowances are displayed.
This new view is meant to highlight when there is still work to be done with regard to HAP Requests. The window will list:
HAPs to build – For any contract that need a HAP Request built for it, the Build New HAP Request task will be available from this window.
HAPs to reconcile – For any HAP Requests that have been built, but have not yet been reconciled, the Reconcile Selected HAP Request task will be available from this window. NOTE: Only Active HAP Requests effective after 04/01/2007 will be listed as needing to be reconciled.
HAP payments due – For any HAP Requests that have been built and reconciled. No tasks will be available from this window. Users must navigate to Property Manager > Accounting Detail > Payments Tab to receive the Subsidy – HAP Request payment.
With the addition of the Reconcile Selected HAP Request task (see New HAP Reconciliation Process below for an explanation of this new task), the use of these tasks should be limited to a few situations. For example, these tasks would still be needed if the user is not ready to reconcile the HAP request, but needs to make revisions at the request of HUD/Contract Administrator. The tasks are available until the HAP Request that includes the certification has been reconciled.
A new Reconcile Selected HAP Request task has been created. In summary, this wizard is a HAP reconciliation process used to adjust the HAP Request to account for certifications that were rejected and payments that were held or released by HUD. It guides users through the steps of reviewing the certifications that were transmitted on a HAP Request. Throughout the reconciliation process the system will show the updated running balance of total regular assistance, total adjustments, total HAP vs. entered Revised HAP amount. – remaining difference to reconcile. Users may leave the wizard before the reconciliation is complete, and pick up where they left off when they return. When the certifications on the HAP Request are successfully updated, and the components that will make up the HAP payment are identified, the HAP Request will have a status of Reconciled. NOTE: This wizard will be available for a successfully Reconciled HAP that may yet be modified and re-reconciled.
The Reconcile Selected HAP Request task will only allow reconciliation of active or reconciled HAP Requests that do not have a payment batch posted against them. It will also only allow users to reconcile the most recent HAP Request date for a contract. The reconciliation needs to be done before the payment is received against the HAP Request and before the next HAP Request is built.
By creating a separate task for this activity, it is possible to assign this responsibility to the same user who builds the HAP Requests, and not necessarily to the user who posts the subsidy payment. It is recommended the reconciliation be completed around the 20th of the month when any revisions to the HAP Request are made available by HUD. For strategies on how to gain access to the accepted HAP information, contact Bostonpost Support. Once a HAP Request is reconciled posting the payment should require no extra analysis.
After a user has selected a HAP Request to reconcile, if there is an Active HAP Request for a prior month that has not yet been reconciled, a warning will be displayed ”The prior HAP request should be reconciled first to ensure payment is posted correctly.” The user can continue with the current HAP Request reconciliation, but it is recommended that the prior HAP Request be reconciled first.

Steps for reconciling a HAP Request:
Start Reconciliation – On the first tab, enter the Revised HUD Total.
Enter the subsidy amount approved by HUD. Even if this amount has not changed from the original request, you should still reconcile the HAP Request.
When you click Next and the HAP Request you selected was already successfully reconciled, the task will prompt you to confirm that you want to continue.
If you do, the status of the HAP reverts from RECONCILED to ACTIVE.
If the Current HAP Total equals the Revised HUD Total you just entered, when you click Next you will see all the reconciliation tabs available. You can click on the Complete Reconciliation tab to skip the other detail pages and complete the Reconciliation.
Certifications – The Certifications tab is broken down into two areas:
The top shows certifications already on the HAP Request, if any.
The Default status for each is set to Accepted by HUD, and can be changed to Rejected by HUD.
If certification is changed to Rejected by HUD, the task will perform the ”Delete Selected Transaction and MAT Record” process. This will un-confirm move-ins, move-outs and transfers, and will delete the certification from the household. Once the problem is resolved, you may need to recreate the certification from the household view tasks.
If a move-out certification is to be marked as Rejected by HUD, any subsequent activity (such as the next MI) on the unit must be undone before the move-out can be removed via this reconcile wizard.
You will need to exit the task to perform these tasks and come back to complete.
There is a View link next to each Certification if a TRACS response exists on this household/unit. Double click on the link to view TRACS responses in a pop-up window.
The bottom shows certifications not on the HAP Request which are eligible for the HAP, if any.
Status will default to Pending Next HAP, but can be changed to Accepted by HUD
If status is changed to Accepted by HUD, the task will perform the ”Add Selected Transaction and MAT Record” process to add this certification and its adjustments to this HAP. Only add a certification to the HAP request at the direction of HUD.
You can change multiple rows before clicking the Next button.
Misc Adjustments, Special Claims, Regular Subsidy and Subsidy Adjustments all work in a similar manner.
The top shows items on the HAP Request, if any, and
Items not on the HAP Request (but eligible), if any, are shown on the bottom.
Misc Adjustments
Rows in the top half default to ”Approved for Pmt”, but can be changed to ”Not Approved”
Rows in the bottom half include items from this HAP Request and previous HAP Requests that default to ”Not Approved”, but can be changed to ”Approved for Pmt” to include on this HAP Request.
Special Claims
Rows in the top half default to ”Approved for Pmt”, but can be changed to ”Not Approved”
Rows in the bottom half include items from this HAP Request and previous HAP Requests that default to ”Not Approved”, but can be changed to ”Approved for Pmt” to include on this HAP Request.
Regular Subsidy
The top half defaults status for each row is set to ”Approved for Pmt”, but can be changed to ”Held by HUD”.
The top half of the window will list any amounts paid by HUD included on this HAP Request
The bottom half shows amounts HELD from this or previous HAP Requests, which can be put on this HAP Request if needed.
The bottom half of the window will list any amounts previously held by HUD that could be included in the HAP Request if HUD has decided to release payment on them.
Subsidy Adjustments
The top half defaults status for each row to ”Approved for Pmt”, but can be changed to:
Approved $1 More – to handle rounding
Adjustments for rounding will show as FORQs-Field Office Accounting adjustments on the Subsidy Activity tab and in the payment process when you create a payment for this HAP Request.
Approved $1 Less – to handle rounding
Held by HUD
The bottom half shows amounts HELD from this or previous HAP Requests, which can be put on this HAP Request as needed.
You can also change amounts for rounding as above. ??rounding on held items?
Complete Reconciliation – The summary screen at the end works like the summary screen when receiving a payment batch.
It summarizes the batch, points out any errors (taking into account the Revised HUD Total entered at the start).
If there are no errors, NEXT gives the user the option to mark the HAP as RECONCILED and 'complete' the process.
If the HAP has errors, the user is notified that the reconciliation process can not be completed.
Print Options – The final tab allows the user to print a reconciliation report which will reflect any changes made during the reconciliation process.
You are able to restart, leave, or re-enter the reconciliation process at any point, but a HAP Request is only reconciled when you complete the wizard and respond to the confirmation prompt.
The Reject Selected Item task will only be available until the HAP Request has been reconciled. This will prevent users from accidentally rejecting the active reconciled HAP Request.
The contract number columns have been changed to first show contract number, and if none then project number, and if none then HUD subsidy type. This change makes it easier to work with communities that have multiple HUD contracts without a contract number. This display is changed on the TRACS HAP Request Tab and other views that require the contract number be selected.
The File Name field is larger in the HAP Requests Tab and in underlying tasks, so it now displays the entire File Name.
When transmitting the files for a single HAP Request, users have the option to send a single PDF file containing the HUD form 52670 and HUD 52670-A PART 1 to any e-mail address destination. The e-mail is sent from the user's local machine/e-mail with the PDF file as an attachment.
The destination field will display all e-mail addresses in the "Section 8 Transmit Methods" Lookup Table, plus the "Admin Email" value entered for the contract, if any. Users are also free to over-type the destination value with any e-mail address.
If users have not installed the PDF support, they will receive an error directing them to the Help menu to install it.
When clicking Finished the following message will be displayed. Click Yes to send the e-mail.
The Subject Line and body of the e-mail detail the HUD 52670 Forms that are attached to the e-mail.
After the PDF files are created and the e-mails are sent, the PDF files are deleted from Property Manager, but users can always check the message in their e-mail outbox/sent to see the contents of the files.
Before being able to print PDF files users will need to download and install ”AFPL Ghostscript” software. This software is not supported or distributed by Bostonpost, but a free download is available from the internet. The Help menu includes a PDF Support submenu that assists users with installing the necessary components, verifying installation, and producing a sample PDF document. The initial installation will require administrative rights on the local computer. Note that PDF support is optional. Please read all instructions/notes carefully before installing this software.
When a user is building a new HAP Request, Property Manager looks at the contract pick list to find the next contract in the pick list, and remembers the "next contract", if there is one. At the end of the Build New HAP Request Task, the NEXT button will be enabled if a "next contract" exists, i.e. – there are more HAP Requests to build. Clicking NEXT will reset the wizard to the beginning of the task, with the "next contract" value pre-selected. Clicking FINISHED will close the wizard normally. If no "next contract" exists, all HAP Requests for the selected month have been built, when the last contract is selected, the NEXT button at the end of the task will not be enabled and the FINISHED button is the only option.
This new functionality will work when a user has a community selected in context or when <All Authorized Communities> is selected in the Context Bar. This will be most useful when a user leaves the community context as <All Authorized Communities>.
This functionality is only available when building a New HAP Request. It is not available for any other tasks in this window (i.e. rebuild, baseline, single tenant file, etc.).
The Task Rebuild TRACS File in Selected Item will only be available when the most recent HAP Request for a particular contract is highlighted. The task will not be available for any older HAP Requests. This added restriction will prevent users from corrupting the current HAP Request by modifying the prior HAP Request.
Alien Registration Number has been added to the Family Record section of the PIC transmission file layout.
Other changes to the PIC Transmission file layout are as follows:
The 50058 validation tool has been updated in conjunction with PIC Transmission file layout changes. The validation tool that is run during the Build PIC transmission file process in Property Manager.
This window has been enhanced to give users the ability to select households with the same Recert Date. To the right of the window is a ”Households” box where you can enter a Recert Date to pull back households with that recertification date instead of all households in the community. After entering this date, the user will select the community from the list on the left side of the window and click Next to continue with this step of the Annual Recertification Process. If no date is entered in this field, all households in the community will be included in the process.
This allows users to print all the documents related to starting the Annual Recertification Process for all households with the same Recert Date in more of a batch process, instead of going to each household and producing the documents for one household at a time. Generally, once the documents start being returned by the tenants, the process will be completed from each individual household.
The windows for creating, approving and exporting AP Invoices has changed with Version 7.3 After Receiving new AP Invoices under Property Manager > Accounts Payable Detail, there is now one window to approve these invoices and then export them over to the accounting system.
From Property Manager > Accounts Payable Detail > Receive Invoice, AP Invoices are created and existing invoices that have not been approved and exported are maintained.
Receive Invoice – There have been no changes to the first tab of the process.
Fill out the header details as before and select PO Line Items for PO Required Invoices.
Invoice Detail – There have been no changes to the step for the process except the Expense Code Distribution for PO Line Items.
The Materials and Skills Lookup Tables have been updated to include defaults for the GL Account Number. If a GL Account Number has been added to the material or skill on the PO Line Item, the Expense Code will default to this.
You can change the Expense Code if the invoice needs to be expense elsewhere.
The Business Detail for a vendor has also been updated to include defaults for the GL Account Number. If a GL Account Number has been added to a Business, the Expense Code will default to this.
You can change the Expense Code if the invoice needs to be expense elsewhere.
If you have defaults at both the business and at the material/skill, the GL Account Number assigned to the business will supersede the material/skill default.
This window combines the old ”Approve Invoices” and ”Pay Invoices” windows into one window. At the top of the window the user first selects invoices to view:
Select the Invoice Status – next to the first 4 invoice statuses will be the number of invoices that fall into that category
Approved
Incomplete
Ready for Approval
Window defaults to this status when you first navigate to it.
Held
All Pending
This invoice status will include all invoices that have been approved, incomplete, ready for approval and held. Basically all invoices that have not yet been exported.
Exported
Select the Vendor
Leave selection blank to see invoices for all vendors
Select one vendor to see only that vendor’s invoices
Select an Invoice Date Range and click Refresh.
Once you have the your list of invoices based on above, you can then filter that list further by PO Number, Invoice Number, Community, Purchased by, or Hold Type. The list of tasks will vary by the Invoice Status selected.
The window will display a list of invoices based on your selections and filters. Security is in place so you will only see invoices billable to the communities that you are authorized to see. After highlighting an invoice you will see the Line Items making up that invoice, as well as any notes added to the invoice. Double-clicking on an Invoice Number will take you to the Maintain Invoice window. As long as the Invoice Status is not Approved or Exported, the invoice is maintainable from this window. Double-clicking on a PO-Line Item Number will take you to the Maintain Purchase Order window with the particular line item selected. If the invoice was created and exported through the Maintenance Company AR Detail, only the AP expense code can be maintained.
When selecting an invoice to perform a particular task, you also have the Select All and Deselect All links available to aid you in your selection process for performing a particular task.
This window has changed from previous versions. Select a vendor and then select an invoice to view and/or maintain. Once an invoice has been exported to your accounting system it is no longer maintainable.
This window is available to do research on all invoices regardless of their status. Invoices can be selected by Invoice Nbr, Community, Vendor, PO Number or Received Date Range. From this window you can right click to print a selected invoice or to maintain it. You can also double click and Invoice Number or a PO Number to view or maintain the Invoice or PO, respectively.
After AP Invoices have been created under Property Manager > Accounts Payable Detail > Receive Invoice or created from the Maintenance/IOI AR Invoice Process, the AP Invoices will be displayed in the Invoice Detail window with an Invoice Status of ”Ready for Approval”.
Unapproved Invoices can either be approved or maintained.
Approving Invoices
Just click Finished to approve
After Invoices have been approved, they can either be Exported or Unapproved.
Selecting the Export Invoice(s) Task will send the invoices to your accounting software
Set the GL Posting Date as part of this process.
The Invoice Date is set when it is created.
There is a ”No Export” check box, when selected, will mark invoices as exported without sending them to the Maintenance Company’s accounting application.
Selecting to Unapprove Invoices will set them back to the status of Unapproved. From there they can be maintained, held for accounting or maintenance, or approved again.
Once Invoices have been exported, the only available task is the Add, Maintain, Delete Notes and the Print Invoices.
Exported Invoices are no longer maintainable in Property Manager
See Accounting Setup - Management and Maintenance Companies Export Setup under System Administration below, for details on setting up Management Companies. This setup is necessary for AP to work for line items payable to a Management Company.
The description of a PO line item is the description of work, which ultimately shows up on the Maintenance/IOI AR Invoice. For each Line Item/Task a Notes field has been added where further instructions to the vendor/person doing the work can included. Entries in the Notes field will show on the Printed Purchase Order. The text entered into the Notes field will append to the end of the Description on the Printed Purchase Order. When a Maintenance/IOI AR Invoice is printed, the note added to the underlying Purchase Order/Line Item will not appear. Only the description for the line item will appear on the Printed Maintenance/IOI AR Invoice.
Validation has been added to the Complete Date entered on tasks or line items of a Purchase Order. The Complete Date entered must be after start date, and once the Complete Date has been entered, the start date cannot be modified to be after the complete date.
For Purchase Orders with the Maintenance/IOI Company with completed Line Items (Materials or Task), these line items will show up in the Create Invoice queue under Property Manager > Maintenance Company Detail > Create Invoice. There are occasions when a line item will not be billed to an AR Invoice from the Maintenance Company, and there is a task in the Create Invoice window to remove them from the queue. When they are removed, those line items will have an Invoice Status on the Purchase Order of ”Invoice: memo – not invoiced” and the Paid Date will indicate N/A.
When printing Purchase Orders from Property Manager, if the building the work is to be done in was built prior to 1978, the following line will print at the bottom of the purchase order:
![]()
The Year Built for a building of a community is maintained at Community Detail >Building Tab. When users enter a date into this field and save, any existing purchase orders for this building/community will not print with the above line. The line will only appear for purchase orders created after this Year Build field has been updated.
A new field has been added for an External Business (Vendor) ID. This field is required for customers who also use Bostonpost Financials. The External Business ID matches the Vendor ID in Bostonpost Financials AP, and facilitates the loading of vendor invoices created in Property Manager to Bostonpost Financials and other accounting software packages.
A new field has been added for a Default GL Account. When receiving invoices against a business/vendor with this field filled in, the invoice line items will default to this GL Account for the expense distribution. The Default GL Account is a drop-down list that is populated from System Administration > Accounting Setup > GL Account Setup.
This Default GL Account is only the default for receiving A/P Invoices. It can be overridden when the invoice is received or maintained.
After creating invoices from Maintenance Companies (including IOI companies), there is now a second window to approve these invoices and then export them to the accounting system.
A listing of all completed Work Orders broken down by Line Items on the Work Order for the Vendor Selected will be displayed.
The Vendor drop down list will only include vendors designated as a Maintenance Company on System Administration/Accounting Setup, Export Information.
Choose a Line Item Filter (All, By Material, By Community/Unit, By Purchaser, By Skill, Start Date Range, Complete Date Range, By PO Number).
When selecting a Line Item Filter other than All, you will get additional drop down lists based on the filter by item you select.
Security is in place to limit the list of PO Line Items to those that are for the communities that the user is authorized to see.
After choosing your vendor, Line Item Filter and clicking Refresh, select the Work Order Line Items for which you want to create an AR Invoice and select the task ”Create IOI AR Invoice”.
Work Order Line Items are grouped by Community. If you select Line Items from more than one community, an invoice will be created for each community selected.
Only closed line items can be included on an IOI invoice.
If a line item is from a PO that has other line items that are still opened, you will see a note specifying that there are still line items from this PO that have not yet been closed/completed.
If you select Line Items from more than one community, an Invoice will be created for each community included in the selection.
You cannot add line items from more than one community into the same invoice.
If you select a Line Item with Zero Amount Billed, you will get a warning to that effect, but you can continue to add that line item to the invoice.
Once you have made your selections, you can click on the ”Selected” column heading to sort by the selections to see them grouped together.
Clicking finished to this task will create an AR Invoice.
The other task available from this window is to ”Remove from queue - Do Not Invoice”.
This allows you to remove Line Items that you do not intend to bill.
When going into a PO with Line Item(s) that were removed above, they will be marked ”Memo - Not Invoiced”.
This window replaces the old Billing – ”Approve Invoices” and ”Billing – Export Invoice” windows into one window. At the top of the window you first choose which invoices you want to view:
Select the Invoice Status
Unapproved
Approved
Exported
ALL Invoices
Select the Vendor
The Vendor drop down list will only include vendors designated as Maintenance Company under System Administration/Accounting setup/export information
Select a Date Range and click Refresh.
Once you have the your list of invoices based on above, you can then filter that list further by PO Number, Invoice Number, Community or Purchased by. The list of tasks will vary by the Invoice Status selected.
The window will display a list of invoices based on your selections and filters. Security is in place so you will only see invoices billable to the communities that you are authorized to see. After highlighting an invoice you will see the line items making up that invoice, as well as any notes added to the invoice. Double-clicking on an Invoice Number will take you to the Maintain Invoice window that is also created when AR Invoices are approved in Property Manager. Double-clicking on a PO-line item number will take you to the Maintain Purchase Order window with the particular line item selected.
When selecting an invoice to perform a particular task (especially the Approve, Un-Bill, Export, Unapprove tasks), you also have the Select All and Deselect All links available to aid you in your selection process for performing a particular task.
After AR Invoices have been created under Property Manager > Maintenance Company Detail > AR Detail > Create AR Invoice, the AR Invoices will be displayed in the AR Invoice Detail window with an Invoice Status of ”Unapproved”.
Unapproved Invoices can either be Approved or Unbilled (delete selected invoices – sending the PO Line Items back to the Create Invoice window to be included on another invoice; or remove the PO Line Items from the Create Invoice Queue (Do Not Invoice).
Approving AR Invoices
The Invoice Date is set as part of the Approve Selected task.
In prior versions of Property Manager, the invoice date was set during the export process when the user set the paid date.
By separating the approval step from the export step, this process is more like the process for approving and exporting AP Invoices under Property Manager > Accounts Payable Detail.
After AR Invoices have been approved, they can either be Exported or Unapproved.
Selecting the Export Invoice(s) Task will send the invoices to your accounting software with the invoice date set at the approval step.
There is a ”No Export” check box, when selected, will mark invoices as exported without sending them to the Maintenance Company’s accounting application.
Selecting to Unapprove Invoices will set them back to the status of Unapproved. From there they can be sent back to Create Invoice queue or approved again.
Once Invoices have been exported, the only available task is the Add, Maintain, Delete Notes and the Print Invoices.
Exported Invoices are no longer maintainable in Property Manager.
For those customers who use AR Invoicing but do not export to their accounting software, there is now a ”No Export” Export Type that works with the Maintenance Company Detail > AR Detail – Export Invoice Task.
Users have the ability to set this for the Maintenance Company at System Administration > Accounting Setup > Export Information Setup. Highlight the Maintenance Company or Companies and set the Export Type to ”No Export”.
Also from within the Export Invoices Task, there is a ”Do Not Export” check box that users can use if it is only an invoice from time to time, that you do not want to export to their accounting software.
Users can now put documents in waitlist and district groups. Using District as document selection criteria would be a way to define different documents for a group of communities. Using Waitlist Group as document selection criteria allows users to define documents to a Wait List Group instead of just for a community or funding program group combination.
Batch Printing has been moved from ”Household Tasks Print Groups” to ”Community Task Print Groups”. Batch Printing is an option under Property Manager > Community Detail > Print Options, so it makes more sense to maintain the Batch Printing print group under ”Community Task Print Groups”.
The data field behind this merge field has been expanded to help ensure that the full name of a property can be displayed correctly in a document.
Users can navigate to Property Manager > System Administration > Maintain Lookup Tables and select the Waitlist Group Lookup Table and edit the description and community description of the waitlist group.
The HUD consent form has been changed by HUD effective on 02/21/2007. With v 7.3, merge fields have been added for the HUD Consent Form on the Data Source ”d_data_letter” to meet the requirements for the changes to the HUD Consent From:
<<owner_address_line1 >>
<<owner_address_line2>>
<<owner_address_line3>>
<<owner_city>>
<<owner_state>>
<<owner_zip>>
New merge fields have been created in the data source ”d_data_reference” which allow users to pull in the address details for the Local Management Office.
«mgmt_local_office_address1»
«mgmt_local_office_address2»
«mgmt_local_office_city»
«mgmt_local_office_state»
«mgmt_local_office_zip»
«mgmt_local_office_phone»
«mgmt_local_office_fax»
«mgmt_local_office_tollfree_phone»
This is useful for when documents need to be returned to the property instead of the parent company or management company.
The new Merge Field <<head_of_household>> has been added to the data source ”d_data_balance_item”. This merge field gives you the formal full name of the head of household.
A merge field for the age of the head of household, <<age>>, has already been available in d_data_letter (Merge Fields for Letters, Merge Fields for Applications). This enhancement adds merge fields for all members of the household:
<<spouse_age>>
<<adult_cotenant_1_age>>
<<adult_cotenant_2_age>>
<<adult_cotenant_3_age>>
<<dependent_1_age>>
<<dependent_2_age>>
<<dependent_3_age>>
<<dependent_4_age>>
<<dependent_5_age>>
<<dependent_6_age>>
<<dependent_7_age>>
<<dependent_8_age>>
The new Merge Field << estate_property_description>> has been added to Merge Field for Verification Forms (d_data_reference). The Estate Property Description field is located under Property Manager > Household Detail > References when adding a Real Estate reference type. This field is generally used to add the address for the estate property.
The Item Code column has been dropped from this Lookup Table. The table defines the account number and description for Income GL Accounts for the Maintenance/IOI Company for when it bills other communities for work/service performed. This table populates the drop down list in the Skill Lookup Table.
This table is used to define the customers of the Maintenance/IOI Companies. The column ”Export Customer ID” (was ”r;Export Customer Name” in prior versions) is used to enter the Customers ID in the Accounts Receivable/Accounting system for the Maintenance/IOI Companies. The column ”Customer AR Account” (was ”Community AR Account” in prior versions) is used to define the A/R GL Account number to debit for each customer when the Maintenance/IOI company creates an AR Invoice for that customer.
In prior versions this table was called Construction Company Inventory Code. As stated below, this Lookup Table populates the drop-down list for the Materials Income Account column on the Materials Lookup Table.
The column that had been labeled as ”Construct Inv Code” has been changed to ”Materials Income Account” to better describe what the column. The entry here is the G/L Account Number that is credited to the Maintenance/IOI Company when an AR Invoice is created for the selected Material. The entries in this drop down list come from the Construction Company Materials Accounting Lookup Table.
For the Unit Cost and Unit Price columns, users are now allowed to make the entries in these fields Null, instead of having to enter a zero when they do not want to enter specific amounts.
The Skill Lookup Table has been updated for the Acct Code Column. This column now displays both the Account Number and Description as defined in the Construction Company Account Code Lookup Table. This Acct Code is the Income GL Account Number that will be charged on the Maintenance/IOI Company when an AR Invoice is created billing a community.
The Materials Lookup Table has been updated with a new column – Default GL Code. For each material, select from a drop down list the expense code that the selected material should be distributed to when an A/P Invoice is created from a PO Line Item that is for materials. The Default GL Code is a drop-down list that is populated from System Administration > Accounting Setup > GL Account Setup.
This GL Account Code is only the default for receiving A/P Invoices. It can be overridden when the invoice is received or maintained.
If the business/vendor for which the invoice is received for has a Default GL Account assigned to it, that Default GL Account will override the Account assigned to the Material.
The Skill Lookup Table has been updated with a new column – Default GL Expense Account. For each skill, select from a drop down list the expense code that the selected skill should be distributed to when an A/P Invoice is created from a PO Line Item that is for a skill. The Default GL Expense Account is a drop-down list that is populated from System Administration > Accounting Setup > GL Account Setup.
This GL Account Expense Account is only the default for receiving AP Invoices. It can be overridden when the invoice is received or maintained.
If the business/vendor for which the invoice is received for has a Default GL Account assigned to it, that Default GL Account will override the Account assigned to the Skill.
By defining the default AP Expense account, invoices with this skill will not go into ”Coding incomplete” status, they will be ready for approval when they are exported from AR.
The Late Charge Type Code specifies on which balances the late charge will be assessed: Rent Only, All Receivables, or All Scheduled Receivables. Rent Only has been broken down further into two new types:
Rent Only: Outstanding Balance - the late charge will be assessed against the balance due this month that is still outstanding at the time the charge is assessed
Rent Only: Total Billed Amount - the late charge will be assessed at what was billed for the month regardless of what portion had been paid, taking into account the tolerance that had been set for the Late Charge Method.
An indicator has been added to Outside Vouchers for mid-month expiration:
If the ”Mid-month expiration allowed” is not selected/checked off, when entering outside vouchers the end date on the new voucher or when maintaining existing outside vouchers, the date must be the last day of a month.
Upon upgrade to v7.3, all outside vouchers will be defaulted to No for ”Mid-month expiration allowed”. If an individual outside voucher should be set to yes, users will need to maintain this indicator for each outside vouchers.
Users can now apply security to reports. Reports for which a user is not authorized will display with padlock icon ![]() . Attempting to select the report will result in a "Not Authorized" error message.
. Attempting to select the report will result in a "Not Authorized" error message.
Access is either Enabled or Disabled for each report. Any new reports added to Property Manager will default as Disabled, requiring the System Administrator to grant access to the new report to the appropriate Access Roles in Property Manager. If a user does not have access to a report he/she should contact their System Administrator.
For charge types that are created using the Miscellaneous and Rent Concession Internal Balance Types, users now have the ability to enter a ”Default Fixed Amount”. For example, if there is an ID Card Charge for when a tenant needs or loses their ID Card, and the default amount for that charge should always be $10, the Default Fixed Amount for the ID Card charge type can be entered as $10.00. Then, when the charge is assessed at a household using the Add New Receivable task, the Amount Due field will be pre-populated with $10.00. This amount can be changed on the fly, but having the default amount there will save users from having to know (or guess) what the amount of the charge that should be assessed, and should cut down on users charging the wrong amount.
Select any existing Receivable Charge Type that was created using the Miscellaneous or Rent Concession Internal Balance Types. (The ”Default Fixed Amount” field will only be available on charge types created from these two Internal Balance Types.) Select the Maintain Charge Type task, enter the default amount.
This ”Default Fixed Amount” is customizable for each Community/Funding Program Group. The amount specified from System Administration becomes the default for the entire database, but users have the ability to change this amount for each Community/Funding Program Group in the database. From Property Manager > Accounting Detail > Account Maintenance Tab use the Customize Charge Type task for the selected Community/Funding Program Group to change the Default Fixed Amount as necessary. All other Community/Funding Program Groups will still look to System Administration unless they are customized as well.
Please Note: If you have already customized a charge type at the Community/Funding Program Group Level before you add a Default Fixed Amount at the System Administration Level, the change made at the System Administration level will not flow down to the Community/Funding Program Group Level. You will need to make the change at both levels.
Select the Add New Receivable task to add a receivable for the Charge Type that has the Default Fixed Amount set. The Amount field will be pre-populated with the default amount.
The user can modify this amount if necessary before clicking Finished.
In prior versions of Property Manager, the export file location for Maintenance/IOI and Management Companies had been defined under Property Manager > System Administration > Maintain Lookup Tables > Business Constants. The export file location for this is now defined in the Export Information Setup.
The entity list to the left of the Export Information Setup window contains three types of entities: Community, Maintenance Company, and Management Company. In order to better identify each type of export entity, headers have been added to this list grouping each entity by its type.
When users click on the column heading to sort the list of entities, the order of the groups will stay the same, but the list of the entities in each group will sort alphabetically.
A new Add Management Company Export Information task has been created. Management Companies are added to Property Manager under Property Manager > System Administration > Management Offices. Once a management company has been added there, users need to add this entity to Export Information to define its export setup. The fields are the same fields that are available for defining the Export Information Setup for communities plus one additional field – a drop-down list of available Management Companies. This drop-down list will only include Management Companies added under System Administration > Management Offices that have not already been added to the export entity list.
A new Add Maintenance Company Export Information task has been created. Maintenance Companies are added to Property Manager under Property Manager > Business Detail > Find Business, and the business must be marked as an ”In House Vendor”. Once a maintenance company has been added there, users need to add this entity to Export Information to define its export setup. The fields are the same fields that are available for defining the Export Information Setup for communities plus one additional field – a drop-down list of available Maintenance (in-house vendors) Businesses. This drop-down list will only include Maintenance Companies added under Business Detail > Find Business, that are checked as being an in-house vendor and that have not already been added to the export entity list.
Please Note: Only Management Offices and Businesses defined in Export Information Setup will be used in accounting parameters in Lookup Tables, AR Invoice Detail, AP Invoice Detail and Work Orders.
New reports are added continually. The window for viewing reports has not changed in 7.3.
Users can now apply security to reports. Reports for which a user is not authorized will display with padlock icon ![]() . Attempting to select the report will result in a "Not Authorized" error message.
. Attempting to select the report will result in a "Not Authorized" error message.
Access to reports is maintained at Property Manager > System Administration > Define Access. The access is either Enabled or Disabled for each report.
Please Note: Any new reports added to Property Manager will default as Disabled, requiring the System Administrator to grant access to the new report to the appropriate Access Roles in Property Manager. If a user does not have access to a report he/she should contact their System Administrator.
The Conversion Detail is no longer available for communities that are "live". The tabs and tasks are now available only for communities in conversion status.
While a community is in conversion status, receivable and deposit balances will be entered with these tasks. There are a few changes to how these task work:
Delete Selected Receivable has been removed from the right-click pop-up menu.
You can now make changes to amounts directly on the spreadsheet, eliminating the need to reverse, refresh, and re-add.
The Amount fields are always editable. So to change an amount, you do not need to delete/reverse the row and then add it back in with the correct amount. Just change the amount to what it should be.
No matter how many changes you make to an opening balance, when you are done with conversion you will be left with one opening balance event in a household’s event history.
The Reverse checkbox has been changed to a Delete checkbox, which will actually delete the event.
Validation has been added to prevent users from moving a tenant into a unit during initial data entry with rent equal to $0. If Rent should be zero for the household, the user will need to contact Bostonpost Support for assistance.
Previous Release Notes for V 7.2